Introduction
Raycast node is the most common and basic way to cast shadows. It can cast shadows for any object that has a collider, even if it's not solid. You can also use this node with other types of materials like cloth or hair, but keep in mind that they won't produce as sharp an effect as something like metal or stone which require different settings.
In this video we create 3d motion graphics using Raycast node.
In this video I explain Raycasting how it works - Hit Position, Hit Distance and Directions of Raycast node.
How to use raycast node in beginner level
The raycast node is used to detect the closest object from a given position. It can also be used for detecting an object that has just left an area and returns its direction vector. This feature makes it very useful for collision detection and other applications where you need to know if something has been detected by the renderer or not, such as fog or shadows.
Raycasts are used in many aspects of game development, from collision detection to determining the visibility of objects. It is a very useful node for beginners because it is easy to use and understand.
Conclusion
In this section, you learned how to use the geometry node in blender 3D. You also learned about how geometry nodes work and how to create your own geometry nodes.
Here is the complete Nodes setup you can see in one view and Easley to understanding.
I will show you how we use in video, I hope you like this, If you have any questions
drop your comments in below.
Complete Nodes Setup
Note:- This new geometry nodes system in only blender updated versions, please update it
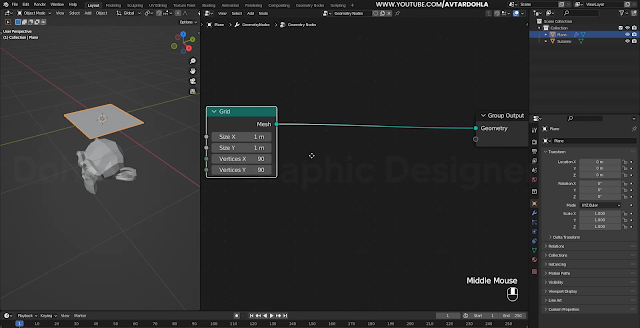
1. Add Object (Plane & Suzanne Monkey)
First select Plane and Click (New)
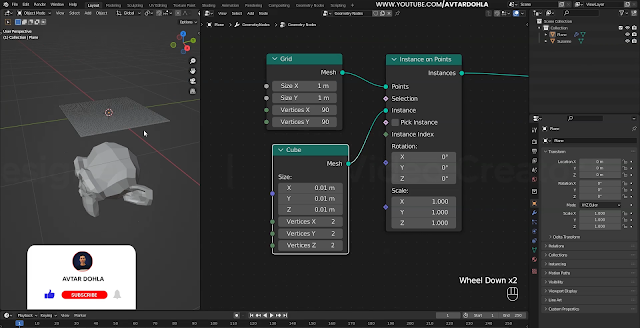
Add a (Grid) node (Size X,Y= 1m) (Vertices X,Y= 90)
Add a (Cube) set the (Same XYZ Size Value) 👇
Set (Relative) target 🎯 Suzanne 👇
(set = Subtract 0.500) 👇
Connect wire = Z Axis
Increase Cube Size Only (Z) 👇 or 👉 Watch Video
Set the same Values 👇


0 Comments