Learn Easy way Instancing on Points node in blender 3d
Introduction
If you're creating a scene with multiple objects, you'll want to use instancing geometry nodes to replicate your geometry. This article explains how you can easily get started with the basics of instancing and then moves on to explain some more advanced features of this process.
Instancing
Instancing is a way of duplicating an object multiple times in a scene. It is used to reduce the number of objects in a scene and improve performance.
It is useful for creating large numbers of similar objects, such as trees or rocks.
Instancing is great for reducing the number of objects in your scene. This allows you to keep only one copy of an object, and all other instances will be copies of that single object. Instancing is also useful when creating things like crowds or armies, where there are many similar objects but each has its own unique properties.
Conclusion
So we have covered a lot of ground here. We started by looking at the basics of geometry nodes and instancing, then delved into some more advanced topics such as dynamic objects, subdividing geometry and more. Hopefully this overview has given you an idea of how to use instancing in blender 3d!
Here is the complete Nodes setup you can see in one view and Easley to understanding.
I will show you How we use in video, I hope you like this, If you have any questions
drop your comments in below.
Complete Nodes Setup
Note:- This new geometry nodes system in only blender updated versions, please update it
1. Add a grid node
Set size XY - 1 m
Vertices XY - 25
Note:- Use search only
2. Add Instancing on points node
Add a Cube set the size XYZ 👇
3. Add a Vector math node and
Add a Math node (set - Add) 👇
Timeline frame set- 250 or you can decrease it
Type- #frame/500 and press enter key👇
If you're don't understand👉 watch here
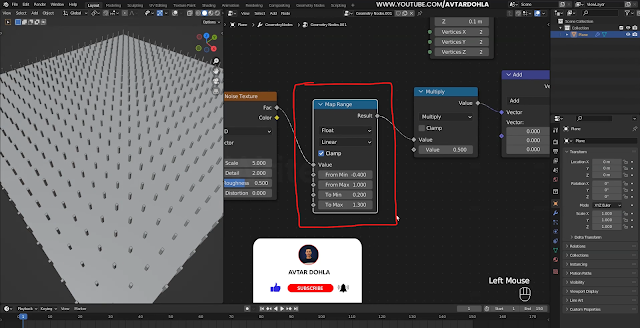
Change Min/Max value (like this) 👇
Add Mesh to points node and
Ico sphere (set- Radius + Subdivisions)👇
Add Math node (set- Multiply) change the value
and Add a Normal node👇
Add a Distribute points on faces node and Ico sphere
Add Realize instances node👇
Change the values (like this)👇


0 Comments