Introduction
This tutorial shows how to create a simple geometry disintegration effect using the proximity node.
Geometry Proximity
The geometry proximity node is used to create a disintegration effect. This can be done by creating a cube that has a high polygon count, then applying the geometry proximity modifier on it. This will create small chunks of geometry that appear to be falling apart from each other due to their proximity.
The geometry proximity node is used to create a disintegration effect. This can be done by creating a cube that has a high polygon count, then applying the geometry proximity modifier on it. This will create small chunks of geometry that appear to be falling apart from each other due to their proximity.
This is a very simple way to use nodes to create a disintegration effect on geometry.
Conclusion
In this article we’ve covered how to create a simple geometry disintegration effect using Blender’s Nodes. We’ve also explored how you can use Blender’s depth-lapse tool to create the same effect using a single material instead of multiple materials with different settings. In conclusion, this is a very useful technique for creating realistic-looking destruction effects in your projects!
In this article we’ve covered how to create a simple geometry disintegration effect using Blender’s Nodes. We’ve also explored how you can use Blender’s depth-lapse tool to create the same effect using a single material instead of multiple materials with different settings. In conclusion, this is a very useful technique for creating realistic-looking destruction effects in your projects!
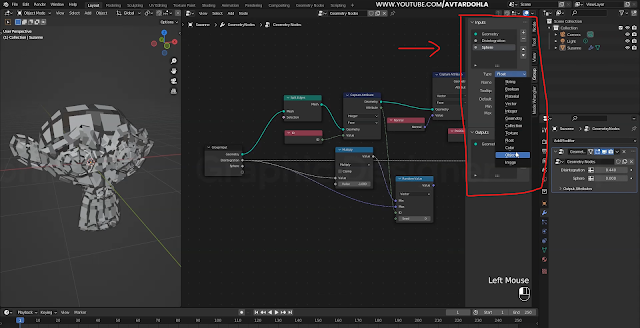
Here is the complete Nodes setup you can see in one view and Easley to understanding.
I will show you how we use in video, I hope you like this, If you have any questions
drop your comments in below.
Complete Nodes Setup
Note:- This new geometry nodes system in only blender updated versions, please update it
This features only Blender 3.1.2
1. Add a Suzanne Monkey and Click New
Set Position and ID Node ) 👇
Click Group and Fill the Same Name & Value 👇
If you're don't understand👉 Watch Here
and Connect wire like this 👇
Add (Normal and Position Node) 👇
Connect Wire Disintegration to Scale 👇
Click Group and Set the Same Name & Value 👇
Add (Object Info & Geometry Proximity) node 👇
Set Value 👇
Thank you for reading...
Don't forget to Subscribe my Youtube Channel
👇


0 Comments